Download Rocking Horse Plans

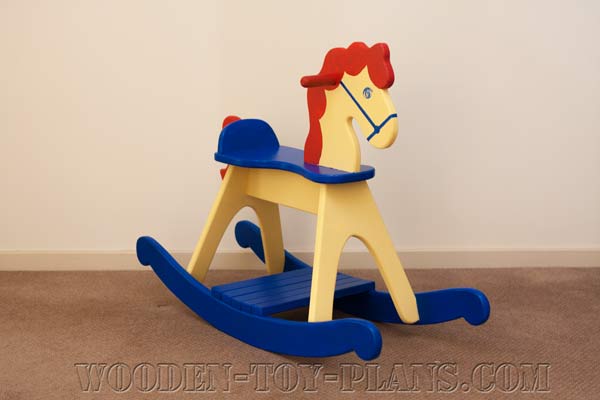
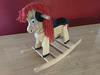
This was my first attempt at designing and building a rocking horse. Based on a photo in a magazine that I had kept for many years.
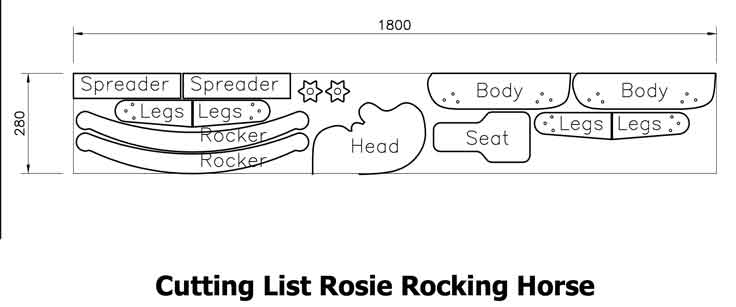
It may sound corny, but I decided to call it Oscar because it was the original. After Oscar was made, I thought he needed a little sister to look after, so I made the drawings for Rosie.

Tools
A list of tools that I used to build build Oscar rocking horse.
Starting with the hand tools:
- Smoothing plane.
- Tenon saw - also known as a back saw.
- Combination square - a tool that I use all the time.
- Builders square.
- Sliding bevel.
- Clamps - I can't have too many.
Power tools:
- A jigsaw or a bandsaw for rough cutting the curved shapes.
- Power drill - corded or battery powered.
- Router mounted in a router table. (Links to my free plans.)
- 6mm round-over router bit.
- Flush trim router bit also known as a pattern bit.
- Biscuit joiner router bit for cutting the groove along the back of the head.
Cutting List
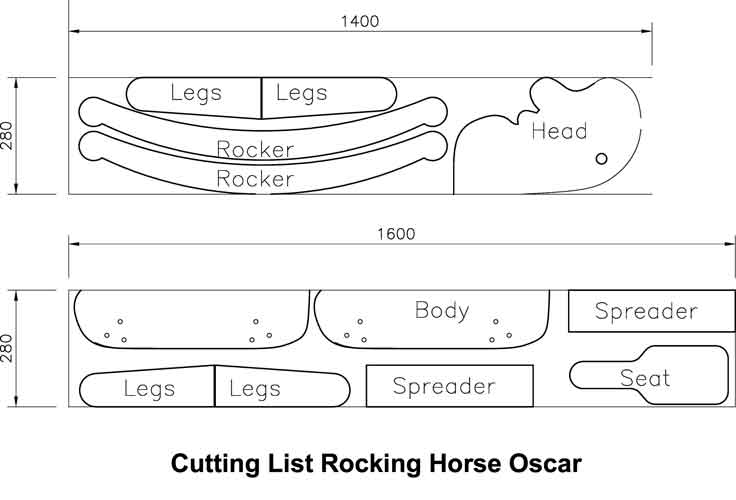
I used 12 inch by 1 inch boards.
Step by Step Building Guide
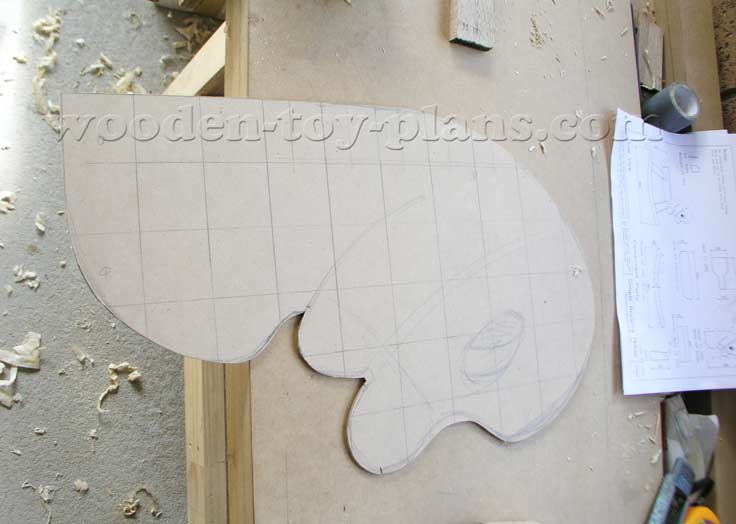
Making a template for the head using 3mm MDF board. For this prototype I used the grid method of transferring the pattern.
I could have drawn the pattern directly onto the board, but my intent was to use a pattern cutting bit in a router mounted upside down in my shop made router table. Click on the link to see how I made that.
It's not entirely necessary to do it this way unless you are going to build more than one rocking horse. Using a router also makes a smooth edge to the board.
Step 2
Drill the hole for the handle. I used a spade bit to match the size of the 19mm dowel.
Step 3
Step 3 is making the rockers.
One thing I have learned over the years is that when cutting out parts for projects, always start with the biggest part. That way if I make a mistake, I can always use this piece for a smaller part.
 Rocker Template
I made just one half of the paper template by marking the line of symmetry and flipping it over to make the other half.
Even if you are not going to use this template with a pattern cutting router bit, I would think it would be a good idea to use it to make a matching pair of rockers.
Step 4
Now for the body of the rocking horse.
Here again, for the prototype, I used the grid method for cutting out the shape for the MDF template.
Step 5
Making the legs and the wedges that attach to the top of the legs to splay them out.
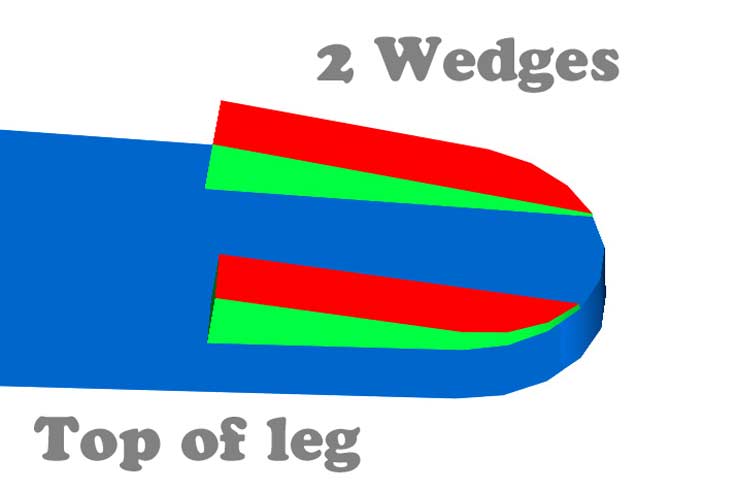
In the illustration above, the leg is shown blue and the pair of wedges is shown green, with the red representing the angle of splay.
Next time I build one of these rocking horses, this is what I would do:
For each leg, cut 4 pieces 120mm long by 19mm square. Glue one pair on top of each leg allowing a bit to overhang the top. This will be trimmed off later.
Once the glue has set, trim them to form the wedges as shown in the illustration.
Step 6
Cut out the parts for the spreader bars.
Step 7
Cut a groove along the back of the head for the mane.
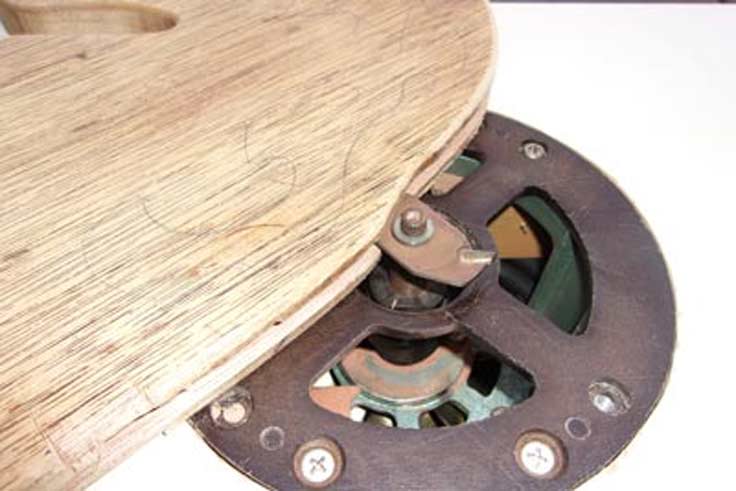
I used a slot cutting bit in my trusty router.
Step 8
Cut out the seat.
Now all the parts are cut out and ready for assembly.
A good idea at this stage to use the round over bit on the edges.
Step 9
Building the head and body assembly. This is built up using two body patterns with the head mounted in the middle like a sandwich.
 Step 9
Glue the head to one side of the body pattern. The infill pieces are made up of scraps shown in red.
This means once the seat is fixed in place, there is a hollow space in the body of the rocking horse. If you want, you could place a marble in here, or make the seat removable and you will have a secret storage space.
Glue the other side and the head/body assembly is ready for the next step.
Step 10
The spreader bars are fixed to the rockers to form a frame.
 Step 10
Attach the legs to the body with a single screw so that the legs can swing.
In the photo, I have used a pair of spring clamps and a length of timber to hold the feet and placed the assembly onto the rocker platform.
Step 11
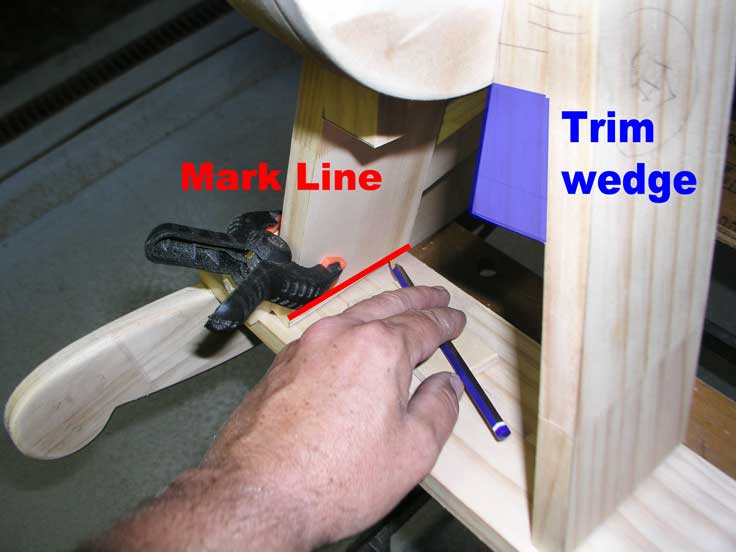
Holding a pencil on a small block, mark the slope of the spreader bars onto the feet. Shown red in the photo.
Do this for each of the legs.
Using a sliding bevel, record the angle of the leg to the spreader bar.
Number each leg according to its position so that you can replace it in the same place.
Looking at the photo, you will see part of the wedges shown in blue with the words "Trim Wedge" to remind you to mark the lines against the body.
Remove the legs and trim the ends to the angle recorded with the sliding bevel.
Step 12
Make a dry assembly before applying any glue.
To do this I re-attach each of the legs onto the body according to the marks I made in the previous step.
Once you are happy that everything fits apply, the glue and screw the legs back in place.
I put three screws into the top of each leg.
To attach the legs to the spreader bars I used screws from the underside into the end grain of the legs.
I also gave my rocking horse a set of hooves using bits of scrap wood.
Thinking about it now, I could have used J-bolts instead, the kind used to attach sheet metal roofs to angle iron supports.
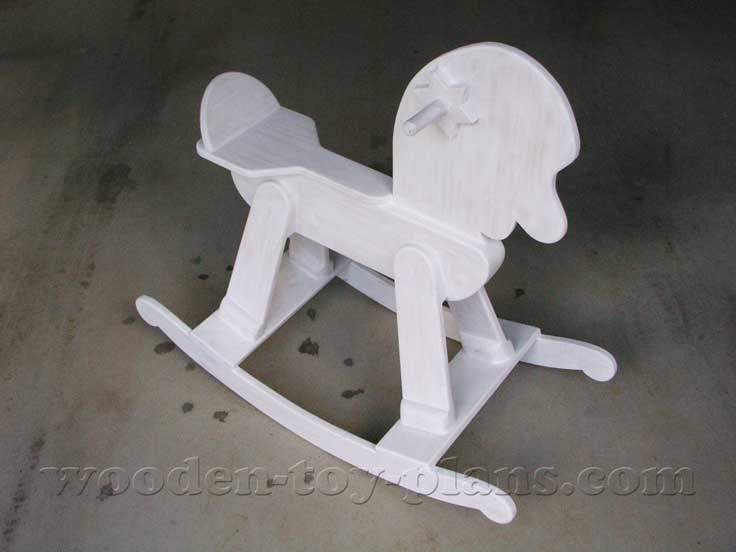
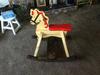
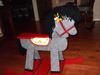
Photo showing Oscar rocking horse with a white undercoat ready for painting.
If you look really carefully, you will see the star shape extra support for the handles.
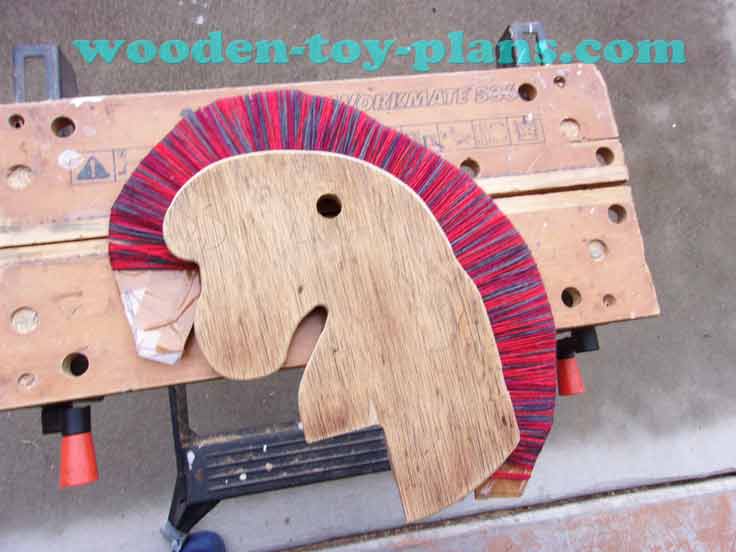
Making The Rocking Horse Mane
How to make the horses mane.
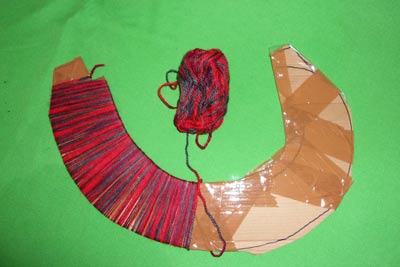
I borrowed a photo of one of my other rocking horse designs.
In the photo, I cut out a piece of cardboard following the outline of the head. Wrap the cardboard with packaging tape, then wool as shown in the photo.
 Making The Rocking Horse Mane
Run a bead of PVA glue into the groove along the back of the head, then insert the mane as shown.
Once the glue has set, cut the wool along the outer edge and remove the cardboard.
Making the tail.
To make the tail, simply hold your hands apart to the length you want the tail to be.
Ask someone to wrap the wool around your hands, as much as you would want the thickness of the tail to be.
Drill a hole under the seat - the size should be large enough for you to fit the woollen loops.
Apply some PVA glue, and stuff the woollen loops into the hole.
Once the glue has set, you can cut the loops, and viola! your rocking horse has a tail.
Download Rocking Horse Plans

More Ride On Toy Projects
Free Rocking Horse Plans easy build novice woodworker
Free rocking horse plans print ready PDF download includes detailed plans, instructions and photos. Easy build with few basic tools using project timber.
Rocking Horse Plans free download Patterns Building notes
Rocking Horse Plans free download print ready PDF. Patterns and building notes. Anyone handy with tools would find this a rewarding woodworking project.
Free Rocking Horse Plan instructions included woodworking project
Free rocking horse plan available for instant download. Complete with construction notes and photos. Easy weekend woodworking project.

Your Rocking Horse Project
Here is where you can share photos of the rocking horse you have made.
More Rocking Horse Projects From All Over The World
See the rocking horse projects made by woodworkers and toy makers from all corners of the globe.
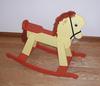
Rockin rex
I liked the rocking horse but thought it needed a bit more. A mask maybe, but what ? Dinosaurs are a big thing now so why not. It works well, it slides …
Thanks for the Rocking Horse plans
I layed out the pattern on some fir 2x4...worked well..had to modify the seat a little
Rocking Horse Rosie
Hi Tony thanks for posting your ideas and plans. Had a great time and learned a lot making this for my granddaughter. Very much appreciate your site.
Rocking Horse by Ron Guggisberg
Tony,
As you can see... I liked your choice of colors too!
A couple more things I will do different next time (next grandchild):
1. Don't use …
Pinto
Just teaching myself woodwork after a lifetime of wondering if I can do it. So thankful I found this plan...many thanks for allowing me to create a little …
Rocking Horse Oscar by Roy Brownlow
Hey Tony,
Greetings from Woodstock, Georgia.
We finished pony. My wife painted it.
Thank you

How to turn your hobby into a profitable business.
Solo Build It! (SBI!) is an online platform that empowers solopreneurs to build profitable online businesses. For over two decades, SBI! has been trusted by members to turn their passions, hobbies, or skills into successful ventures. Recently, the introduction of ChatGPT has ushered in a new era of AI-assisted content creation within SBI!.
Allow me to introduce you to Tai, your business-building AI assistant. Tai is now available in SBI! and can help you navigate the world of online entrepreneurship. Whether you’re a complete beginner or an experienced solopreneur, SBI! provides everything you need to create an income-generating website or blog.
Here are some reasons why starting an online business with SBI! and Tai is a great choice:
- Adaptable Lifestyle: Building an online business adapts to your desired lifestyle. Enjoy newfound freedom without being tied down to another job.
- Low Startup Costs: You don’t need significant capital to begin. All you require is a computer, internet access, a roadmap, and an affordable platform like SBI!.
- Flexibility: Work as much or as little as you want, wherever you choose. Once you’ve built a solid foundation, you can earn money even on days you don’t actively work.
- Portability: Take your business with you, especially if travel is part of your retirement dream.
- Global Impact: Help people worldwide by sharing your knowledge and expertise.
- Continuous Learning: Running an online business keeps your mind active and energized.
SBI! combines education, tools, and a proven process to give you the highest chance of achieving your financial goals. Whether you’re aiming for financial independence or simply want a rewarding project during retirement, SBI! can guide you.
If any of this resonates with you, I invite you to explore SBI! and discover how it can help you build your online retirement business. Even if you’re a beginner, SBI! provides the resources you need to succeed. Say hello to Tai and embark on your entrepreneurial journey! 🚀
Learn more and try Tai for free on the Solo Build It! website.
- Home
- Rocking Horses
- Download Rocking Horse Plans
Recent Articles
-
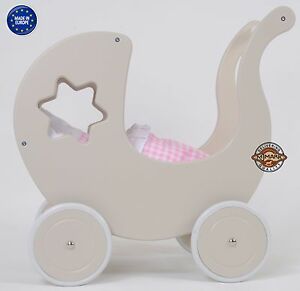
doll's pram on wheels
Mar 09, 25 08:53 AM
 My name is Maryvonne Please, could you help me? I want to build a doll pram but I would like a plan. Thank you very much for your answer.
 -
Toy doll high chair
Mar 09, 25 08:52 AM
Dear Sir/Madam I am looking for a plan to build a toy doll high chair, I built the rocking horse you have on your page from one of your plans and it worked -
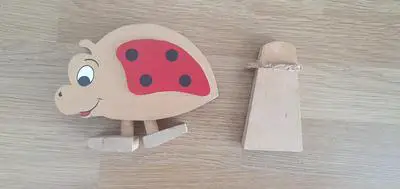
Angle of ramp
Mar 09, 25 08:51 AM
 Hello there I found your website whilst looking for details of how to make a new ramp for a walking ladybird that belonged to my children in the 90s. The