Shelf woodworking plans

This is one of a few easy woodworking projects any beginner can make with scrap wood and just a few hand tools.
I made this using bits of scrap and recycled wood and a squirrel, sorry, scroll saw pattern in a matter of hours. It would be just as easy to use a jig saw, also known as a sabre saw.
This easy craft project makes an attractive and useful gift for the house, equally at home outside as well as inside. It would sell well at craft markets.
How to make a simple shelf
 Exploded View
Download the full size squirrel pattern PDF or squirrel pattern image file.
Print it on your home printer, or visit you local library or office supplies store, or anyone you may know with a printer. It's only a single A4 size page.
If you are somewhat artistic, you could easily make a sketch on a piece of thin card and use that as a template.
Materials list
There is no materials list as such, because I suggest you make it from scrap or recycled wood.
All pieces are 19mm thick project timber.
For the squirrel shapes, two pieces 160mm wide and 210mm high.
For the shelf, one piece a160mm wide and no longer than about 450mm.
For the vertical support battens, two pieces 50mm wide and 240mm high.
8 wood screws, 8g or 4mm in diameter, and 40mm long.
Step 1
 Step 1
Here I have pasted the pattern onto the workpiece and started cutting it out with the scroll saw.
To make it easier for myself, I have drilled a hole at each change in direction so that I can swing the workpiece around.
Step 2
 Step 2
Here I have mounted the squirrel shape in my vice to drill pilot holes to help prevent splitting the wood.
I have also fixed a temporary batten in place.
In the photo, the temporary batten is shown as yellow.
Step 3
 Step 3
Remove the temporary jig, and with the squirrel laying on it's back, drill two pilot holes into the underside of the shelf.
Drill a hole near the top of each vertical support batten.
Depending on how you are going to fix the shelf to the wall, and the type of wall, it may be best to speak to your friendly hardware supplier for advice on the best way to do that.
More Shelf Woodworking Plans
 Diamond Shape Corner Shelf Unit
One of the simplest and most practical home improvement projects is to make a shelf.
This corner shelf may be more decorative than practical, but it is an interesting design.
With a project like this I would use 2 inch stock and bevel the outside edges.
It would be an easy woodworking project if I had a chop saw.
At the start, this looks like an easy woodworking project, and it is indeed, there are just a few things to be aware of. For one, not all walls are straight, and not all corners are exactly right angles.
So, I would measure the angle with a sliding bevel rather that use a builder's square.
How Lucky I am.
I am blessed with a talent to make things more complicated than they should be.
Decide whether to fix the shelves to the wall or make it a complete unit and simply hang it using hidden brackets.
Each choice has its own challenges.
First to decide the method of joints. Simple butt joints are the weakest, and end grain butt joints are even weaker. So, I would consider a loose spline or a biscuit joint. Still not very strong but it does help. My concern is how much weight the shelf can bear, and over time, will the joints start to split.
Now, there is one jointing system that may work, and that is pocket joints. Kreg would be more than happy to take my money, but I wonder if it would be fit for purpose. Pocket joints are best for fixing tabletops because they allow for the movement of wooden top.
Just Me And My Shelf.
In the end, I decided I would use a pair of steel repair plates and corner brackets. That certainly has appeal because it also serves as a reinforcement. Longer wood screws into the repair plate will also fix the main shelf.

Showing the corner shelf in colour for easy identification of the parts.

View from behind showing how I would the T-shape repair plates and the corner brackets.

Parts laid out. I would use a board 4.5m long by 200mm wide by 38mm thick.
 Part 1
Part 1 with nominal dimensions. Make 4.
 Part 2
Part 2, the main shelf. Make 1.
 Part 3
Part 3, very small shelves. Make 2.
Another Corner Shelf
 Corner Shelf
Corner shelf unit colour code, you make one using a sheet of 16mm thick MDF.
Fits into a corner of the room.
 Parts Layout
Parts with nominal dimensions. Make 2 of each part.
One More Corner Bookshelf

More ideas for corner shelves than you can shake a stick at.
Here is one inspired by a post I discovered on Pinterest.

The great thing about this shelf is that you can make it with a single board.

How to measure the angle. The diagram should be self explanatory.

Another way to measure the angles for the shelf supports.
Draw a circle with a diameter of the width of the shelf supports.

Step 2. Draw a line from the corner touching the circle.
This will give you the angle you need to cut the shelf supports.

I have made a few of these free-standing bookshelves over the years, just about every time we move house.
Follow the link for more information about how to make wooden bookshelf plans.

How to turn your hobby into a profitable business.
Solo Build It! (SBI!) is an online platform that empowers solopreneurs to build profitable online businesses. For over two decades, SBI! has been trusted by members to turn their passions, hobbies, or skills into successful ventures. Recently, the introduction of ChatGPT has ushered in a new era of AI-assisted content creation within SBI!.
Allow me to introduce you to Tai, your business-building AI assistant. Tai is now available in SBI! and can help you navigate the world of online entrepreneurship. Whether you’re a complete beginner or an experienced solopreneur, SBI! provides everything you need to create an income-generating website or blog.
Here are some reasons why starting an online business with SBI! and Tai is a great choice:
- Adaptable Lifestyle: Building an online business adapts to your desired lifestyle. Enjoy newfound freedom without being tied down to another job.
- Low Startup Costs: You don’t need significant capital to begin. All you require is a computer, internet access, a roadmap, and an affordable platform like SBI!.
- Flexibility: Work as much or as little as you want, wherever you choose. Once you’ve built a solid foundation, you can earn money even on days you don’t actively work.
- Portability: Take your business with you, especially if travel is part of your retirement dream.
- Global Impact: Help people worldwide by sharing your knowledge and expertise.
- Continuous Learning: Running an online business keeps your mind active and energized.
SBI! combines education, tools, and a proven process to give you the highest chance of achieving your financial goals. Whether you’re aiming for financial independence or simply want a rewarding project during retirement, SBI! can guide you.
If any of this resonates with you, I invite you to explore SBI! and discover how it can help you build your online retirement business. Even if you’re a beginner, SBI! provides the resources you need to succeed. Say hello to Tai and embark on your entrepreneurial journey! 🚀
Learn more and try Tai for free on the Solo Build It! website.
- Home
- Projects
- Easy Woodworking Projects
- Shelf Woodworking Plans
Recent Articles
-
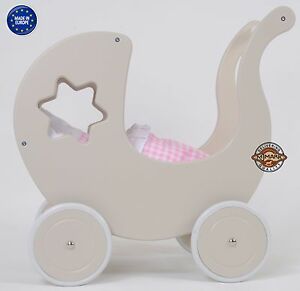
doll's pram on wheels
Mar 09, 25 08:53 AM
 My name is Maryvonne Please, could you help me? I want to build a doll pram but I would like a plan. Thank you very much for your answer.
 -
Toy doll high chair
Mar 09, 25 08:52 AM
Dear Sir/Madam I am looking for a plan to build a toy doll high chair, I built the rocking horse you have on your page from one of your plans and it worked -
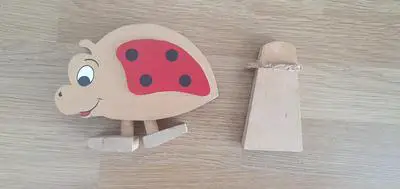
Angle of ramp
Mar 09, 25 08:51 AM
 Hello there I found your website whilst looking for details of how to make a new ramp for a walking ladybird that belonged to my children in the 90s. The